The Product Labels feature allows you to show eye-catching labels for products in search results.
You can add labels to both the Instant Search Widget and the Search Results Widget. Each of these widgets has a Product Labels tab in its section, where you can configure the labels.
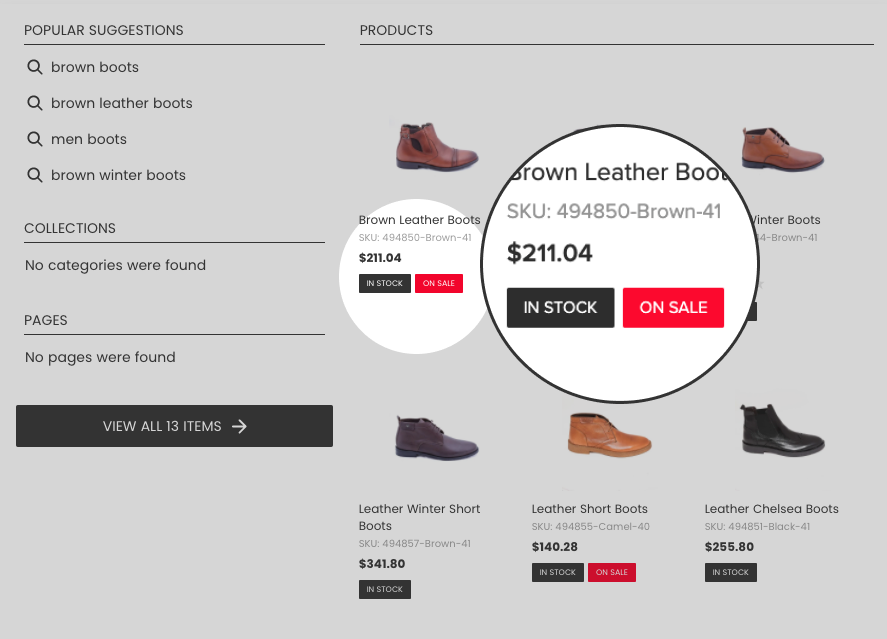
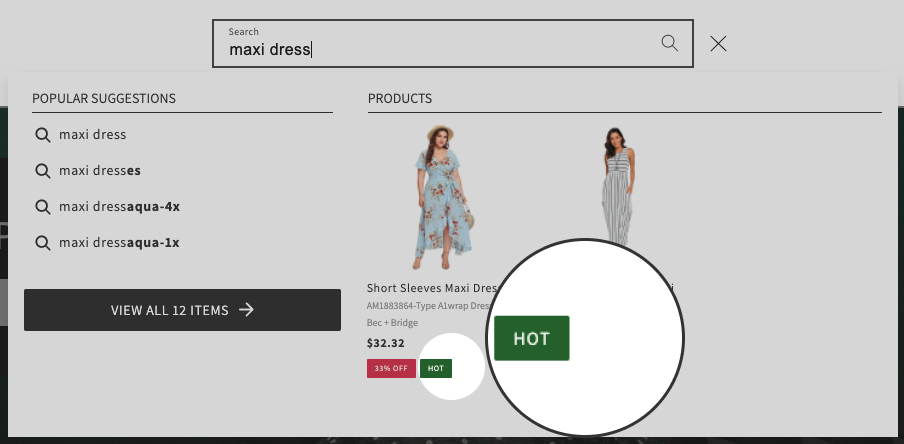
Below is an example of Discount Labels and In-stock Labels in the Instant search widget:
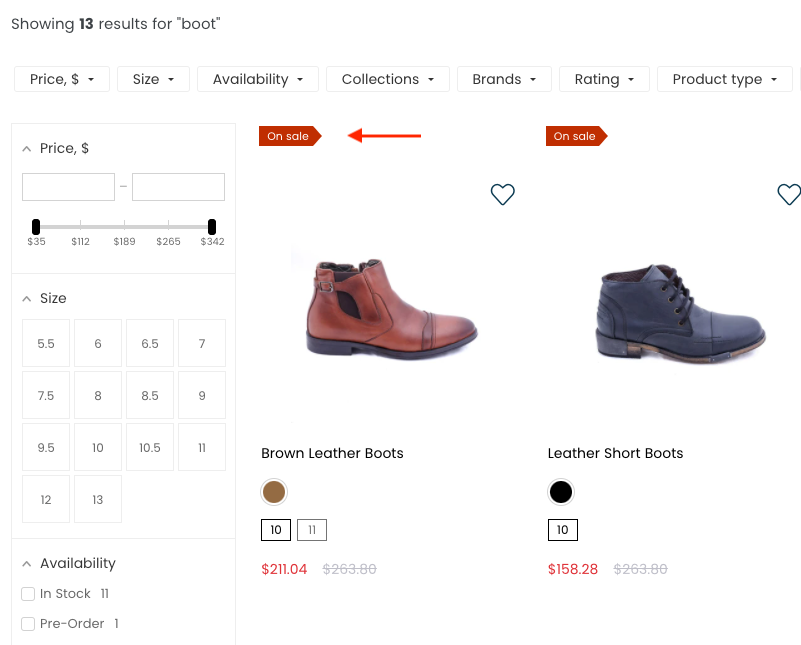
and in the Search results widget:
Discount Labels
You can add Discount Labels to products sold with discounts. To do so, follow these steps:
For the Instant Search widget only: Discount label overrides the Show compare at price option (Search & Navigation > Instant search widget section > Content tab > Products part) which allows showing original product price compared with discount product price.
- Go to the Searchanise Search & Filter control panel > Search & Navigation > Instant search widget or Search results widget section > Product Labels tab.
- Click the Edit button next to the Discount label.
- Switch the Show label toggle to On.
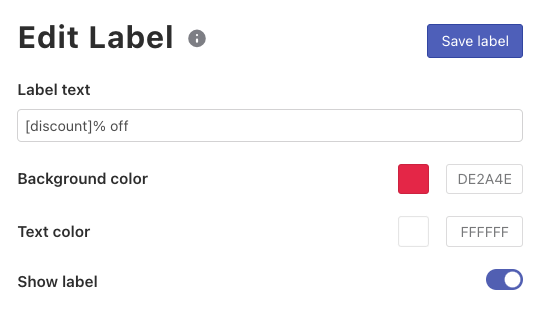
- Optionally, change the background color and the text color of the discount label.
- Optionally, change the text of the Discount Label. If you enter the [discount] parameter in the text box, it will be replaced with the actual product discount.
- Click the Save label button in the top-right corner.
In-stock Labels
You can add In-stock Labels to products to show their availability to customers: in-stock, pre-order, out-of-stock. See the example above.
To do so, follow these steps:
- Go to the Searchanise Search & Filter control panel > Search & Navigation > Instant search widget or Search results widget section > Product Labels tab.
- Click the Edit button next to the In-stock label.
- Switch the Show label toggle to On.
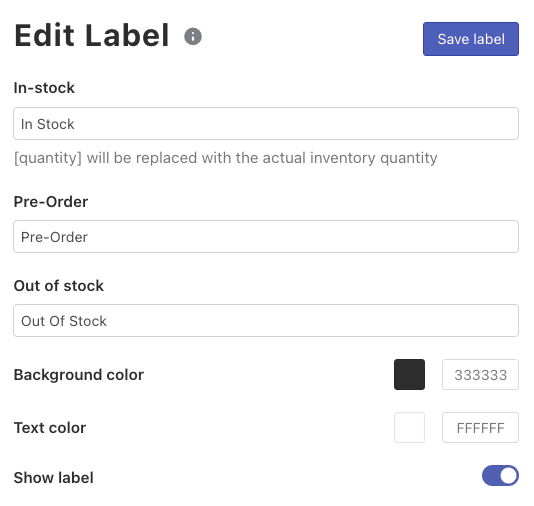
- Optionally, change the background color and the text color of the labels.
- Optionally, change the text of the labels.Note
If you enter the [quantity] parameter into the In-stock text box and product inventory is tracked in your store, it will be replaced with the actual inventory quantity of the product in the widget.
- Click the Save label button in the top-right corner.
Labels by Tags
You can set up custom labels for products based on their tags to highlight certain products in search results.
Adding labels for the Instant Search Widget
Steps:
- Go to the Searchanise Search & Filter control panel > Search & Navigation > Instant search widget > Product Labels tab.
- Click the + New label button.
- Set up the label options:
- Product tag – enter a product tag into the text box.
- Text – enter a text which will be displayed as the label.
- Background color – enter or select the background color of the label.
- Text color – enter or select the text color of the label.
- Click the Save label button in the top-right corner.
The label by tag has been added.
Adding labels for the Search Results Widget
- Go to the Searchanise Search & Filter control panel > Search & Navigation > Search results widget section > Product Labels tab.
- Click the + New label button.
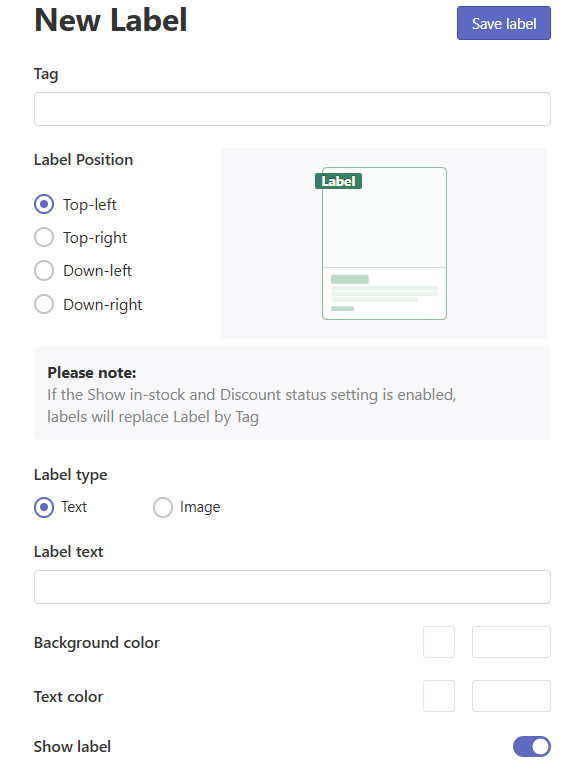
- Set up the label options:
- Product Tag – enter a product tag into the text box.
- Label Position – select the location where you want to display the label.Note
If the discount labels (top-left position) or in-stock labels (top-right position) are also active, only one of the labels can be shown in the position. Labels by Tags have a higher priority than discount labels and in-stock labels have a higher priority than labels by tag.
- Label type – you can show labels as text or images.
- Text – enter the text which will serve as the label, if you select the Text label type.
- Background color – enter or select the background color of the label, if you select the Text label type.
- Text color – enter or select the text color of the label, if you select the Text label type.
- Image – select the image to show, if you select the Image label type. You can choose between 2 ready-made label images (New and Sale) and your own image. To add your own image you’ll need to insert the image URL to the corresponding field.
- Click the Save label button in the top-right corner.
That’s it. The label by tag has been added and it is now displayed in the Search Results Widget.
Editing labels
Steps:
- Go to the Searchanise Search & Filter control panel > Search & Navigation > Instant search widget or Search results widget section > Product Labels tab.
- Click the Edit link next to the label you want to edit.
- Edit the label options.
- Click the Save label button in the top-right corner.
Deleting labels
Steps:
- Go to the Searchanise Search & Filter control panel > Search & Navigation > Instant search widget or Search results widget section > Product Labels tab.
- Select the label(-s) you want to delete.
- Click the Delete selected button.
- Confirm.
Product Labels can be customized further with the help of the Custom CSS feature. In case you need help with that, feel free to contact us. Our support team will gladly help customize them the way you want.
We’d appreciate it if you could take some time to leave a review.