Searchanise now supports new and enhanced filters for the Search Results Widget. You can manage these filters in the Searchanise control panel > Filters section.
Adding Filters
The filters are added automatically based on Product options after re-indexation. The re-indexation occurs automatically, but you can also trigger it manually by clicking the Force re-indexation button in the App’s Dashboard section.
Setting up Color and Size Filters
These filters are created automatically upon the app’s installation.
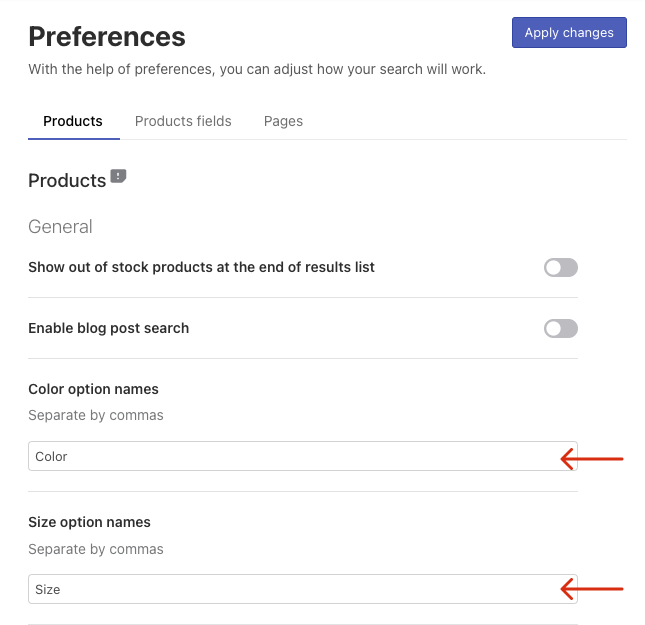
If you have changed the default names of the Color and Size product options in Wix, you need to specify the new names in the app. To do it, follow these steps:
- Go to the Searchanise control panel > Search & Navigation > Preferences section > Products tab.
- Enter new names in the Color option names / Size option names fields respectively.

- Apply the changes.
- Click the Force re-indexation button in the App’s Dashboard section.
Hiding Filters
To hide filters, follow these steps:
- Go to Filters > Filter list > Filters tab.
- Select the necessary filters via the checkbox.
- Click the Edit selected button in the top-right corner.
- Set the status to Hidden.
- Save the changes.
You can also do that by clicking the pencil icon next to the filter and changing the Status on the Settings tab.
Managing the Number of visible Values
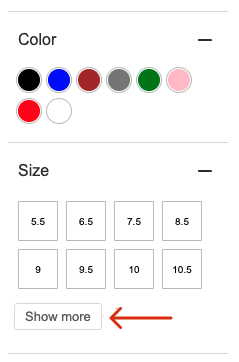
You can set the number of filter values that will be visible in the filters’ sidebar. If the actual number of filter values exceeds this number, the Show more button will be displayed.

To manage the number of filter values, follow these steps:
- Go to Filters > Filter list > Filters tab.
- Select the necessary filters via the checkbox.
- Click the Edit selected button in the top-right corner.
- Set the number of values displayed by default in the More count option. Note
If you set the More count to 0, all filter values will be displayed in the sidebar.
- Save the changes.
You can also do that by clicking the pencil icon next to the filter and changing theMore count on the Settings tab.
Adding search to Filters
You can find the instructions for adding the search box to filters here.
Changing Filters’ Values Appearance
You can choose the appearance of filter values in the Appearance option:
- Default – values as text
- Color – color values as color swatches
- Size – size values as text in frames
To change the appearance, follow these steps:
- Go to Filters > Filter list > Filters tab.
- Click the pencil icon next to the necessary filter.
- Go to the Settings tab.
- Select the look in the Appearance option.
- Click the Save changes button.
Renaming Filters
You can edit filters’ titles as well as their values’ names.
To edit the filters’ titles, follow these steps:
- Go to Filters > Filter list > Filters tab.
- Click the pencil icon next to the necessary filter.
- Go to the Settings tab of the selected filter.
- Type in the title in the Title field.
- Save the changes.
That’s it. You can go to the storefront if you’d like to make sure the filters’ titles are up-to-date.
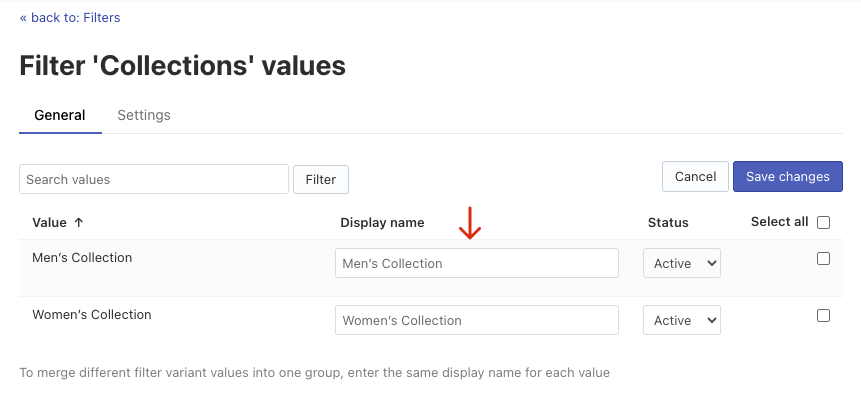
To edit the names of the filters’ values, follow these steps:
- Go to Filters > Filter list > Filters tab.
- Click the pencil icon in the filter row you’d like to edit.
- Click the Edit values button in the top-right corner.
- Edit the values’ names in the Display name column.

- Save the changes.
That’s it. You can go to the storefront if you’d like to make sure the values’ names are up-to-date.
Sorting Filters
You can find the instructions on how to sort filters and their values here.
Bulk editing Filters and Filter Values
You can find the instructions on bulk editing filters and their values here.
We’d appreciate it if you could take some time to leave a review.
