What are store credits?
Store credits represent a specific monetary amount allocated to a customer in your store. They are non-transferable and tied to the customer’s account, with an optional expiration date. Visit Shopify’s Help Center or watch our video with step-by-step screencasts and case studies about store credits.
How to enable store credits?
Navigate to Shopify settings > Customer Accounts > Store credit, and toggle the feature on.
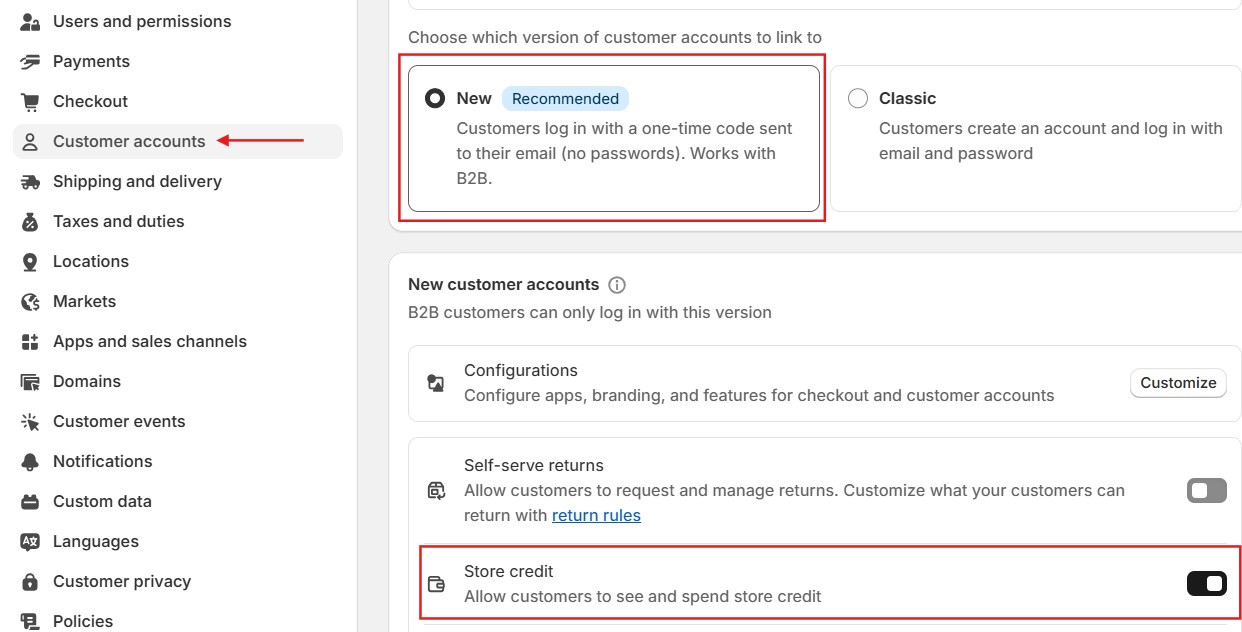
Please note, store credits only function with the new version of customer accounts.
How to issue credits?
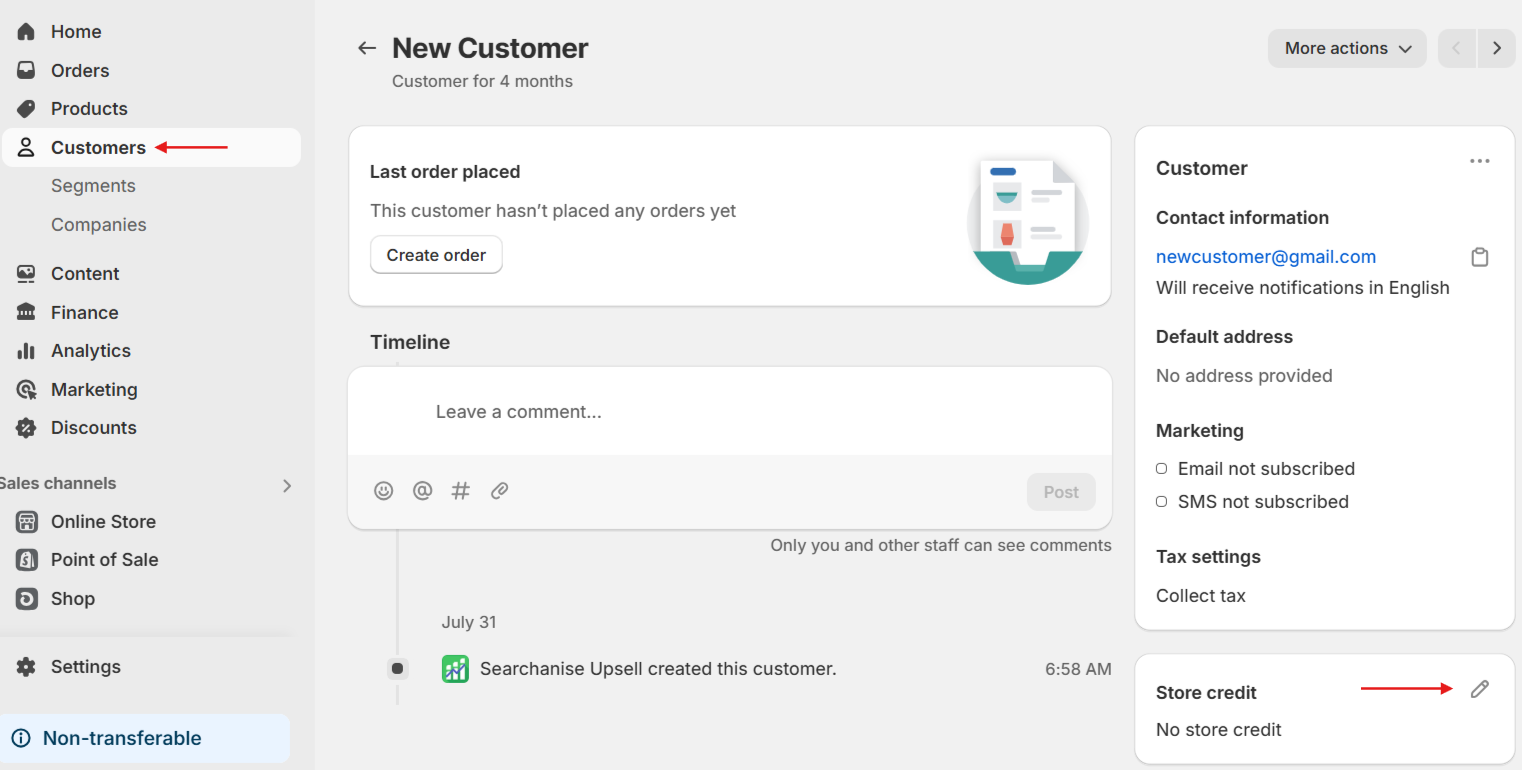
- Go to the Customers section and select a customer.
- Click the pencil icon.
- In the pop-up window, you’ll have two options:
- Credit to add credit
- Debit to deduct credits
- Enter the amount, set an optional expiration date, and confirm by clicking Credit. Refresh the page to view the transaction in the customer’s history.
To view the applied store credits, go to the Orders section, select an order to see the total amount paid, including credits used.
How to use store credits with Searchanise Upsell & Marketing?
You can set up store credits using the Email Collection Bar and the Email Collection Pop-up.
Please note: store credits are available for users on Paid Plans.
Store credits with Email Collection Bar
- Open an existing Email Collection Bar (using the pencil icon) or create a new one (using the Create bar button).
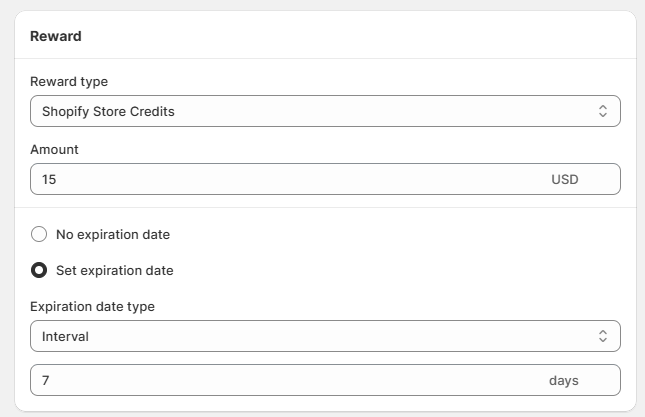
- Find the Reward section, and in the Reward Type dropdown, select Shopify Store Credits.
- Enter the amount of credits you want to offer your customers.
- Decide whether you want to set an expiration date for the credits:
- choose a specific date, or
- select an interval while the credits remain active after their issue.
- Complete any additional customization. Make sure the bar widget is activated and its status is set to Visible.
Now, store credits will be issued to your customers for leaving their emails via the Email Collection Bar.
Store credits with Email Collection Pop-up
- Open an existing Email Collection Pop-up (using the pencil icon) or create a new one (using the Create pop-up button).
- In the Reward Type dropdown, select Shopify Store Credits.
- Enter the amount of credits you want to offer.
- Set an expiration date for the credits if needed.
- Complete any additional customization. Make sure the pop-up widget is activated and its status is set to Visible.
Now, store credits will be issued to your customers for leaving their emails via the Email Collection Pop-up.