Introduction
Product fields are product details that Searchanise Search & Filter imports from your Shopify store to search by them. The following product details are imported:
- Name (Title)
- Description
- Product type
- Vendor
- Tags
- SKU
- SKU for all product variants
- Barcodes for all variants
- Option values for all variants
- Collections
- Metafields (added in the Searchanise Search & Filter control panel > Search & Navigation > Preferences section > Metafields and Metaobjects tab.
Enable/disable product fields for search
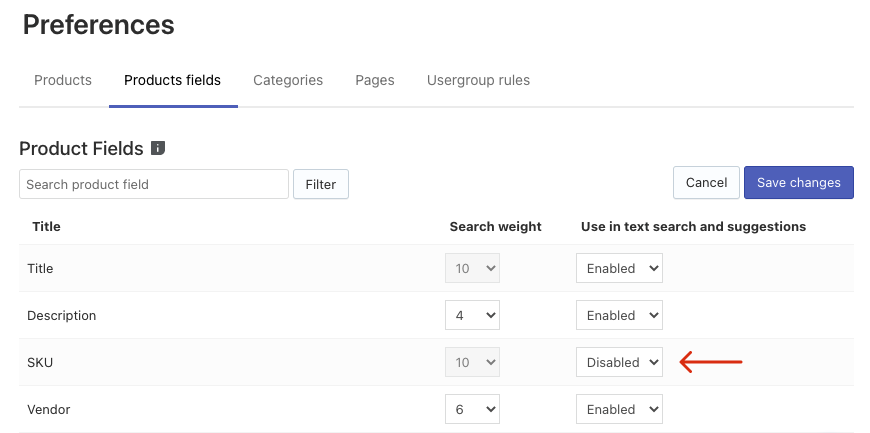
By default, all product fields are enabled for search. You can choose which ones will be enabled. For example, you can switch off the search by SKU. In this case, when a customer enters numbers into your store search bar, Searchanise Search & Filter won’t search them through the SKU of products.
To enable/disable product fields for search:
- Go to the Searchanise Search & Filter control panel > Search & Navigation > Preferences section > Products Fields tab to view Product Fields.
- Click the Edit fields button in the top-right corner.
- Change the state of the product field(s) from Enabled to Disabled or vice versa.

- Save the changes.
- Click the link in the notice at the top or the Force re-indexation button in the sidebar to start indexation.
That’s it. After the indexation is complete, the app won’t search by the disabled product fields.
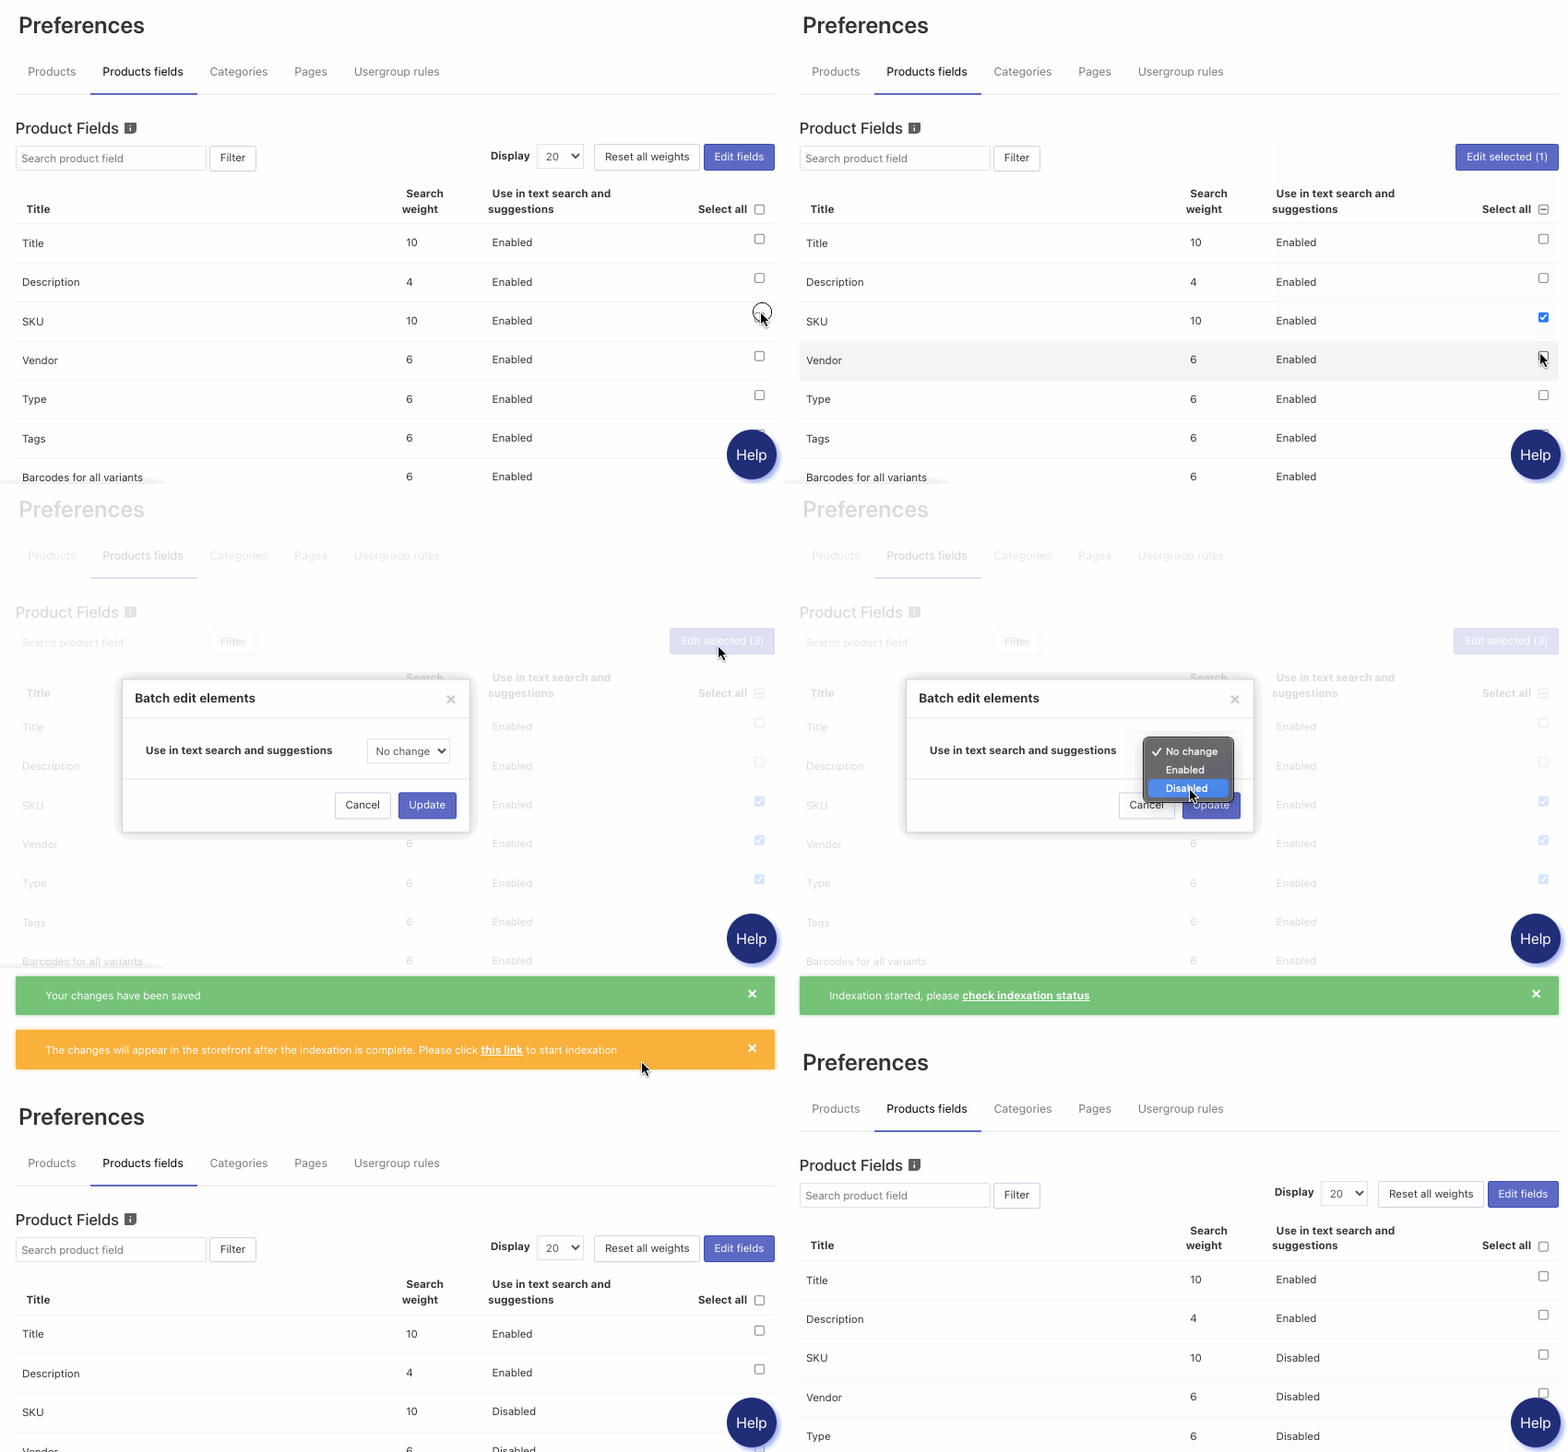
What is more, you can edit all or several product fields displayed on the page at once. To do so, follow these steps:
- Go to the Searchanise Search & Filter control panel > Search & Navigation > Preferences section > Products Fields tab.
- By default, it is shown 20 product fields per page. If you want to show and edit more, change the value in the Display drop-down list above the table.
- Select the Select all checkbox in the header of the table or select certain product fields.
- Click the appeared Edit selected button.
- Select the value of the Use in text search and suggestions drop-down list for all selected product fields and click the Update button.
- Click the link in the notice at the top or the Force re-indexation button in the sidebar to start indexation.

There are two SKU fields in Shopify stores: SKU and SKU for all variants. You should switch off both of them to disable search by SKU.
Set search weight to product fields
Search weight defines the importance of each product field. According to the importance of product fields, the search engine calculates the relevance of each item in the search results list.
By default, product fields have search weights in the following order:
- Title, SKU – the highest weight
- Other product fields (attributes) indexed for the search – have the same weight
- Description – the lowest weight
You can change the search weight for all product fields except for Title and SKU. To do so, follow these steps:
- Go to the Searchanise Search & Filter control panel > Search & Navigation > Preferences section > Products Fields tab to view Product Fields.
- Click the Edit fields button in the top-right corner.
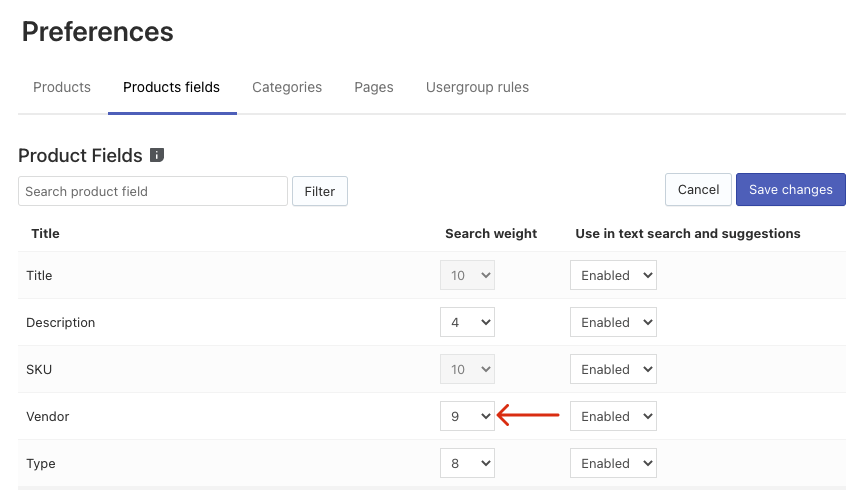
- Change the search weight of the product fields.

- Save the changes.
- Click the link in the notice at the top or the Force re-indexation button in the sidebar to start indexation.
That’s it. After the indexation is complete, the changed search weights will affect the relevance of search results.
- Title and SKU will always have the highest weight over other product fields.
- Merchandising rules with “always” and “keywords” ranking options have the highest weight over all product fields.
- Search weights affect the ordering of search results by relevance. In the Instant Search Widget, search results are sorted only by relevance. In the Search Results Widget, a different sorting can be selected. The “by relevance” sorting is the most recommended.
Reset weights to default values
You can always reset the changed weight to default values. To do so, follow these steps:
- Go to the Searchanise Search & Filter control panel > Search & Navigation > Preferences section > Products Fields tab to view Product Fields.
- Click the Reset all weights button in the top-right corner.
- Click the link in the notice at the top or the Force re-indexation button in the sidebar to start indexation.
We’d appreciate it if you could take some time to leave a review.
