Pop-ups are modal windows that capture your visitors’ attention and increase their engagement.
There are various types of pop-ups:
- The Notification Pop-up announces your store’s special offers and promotions
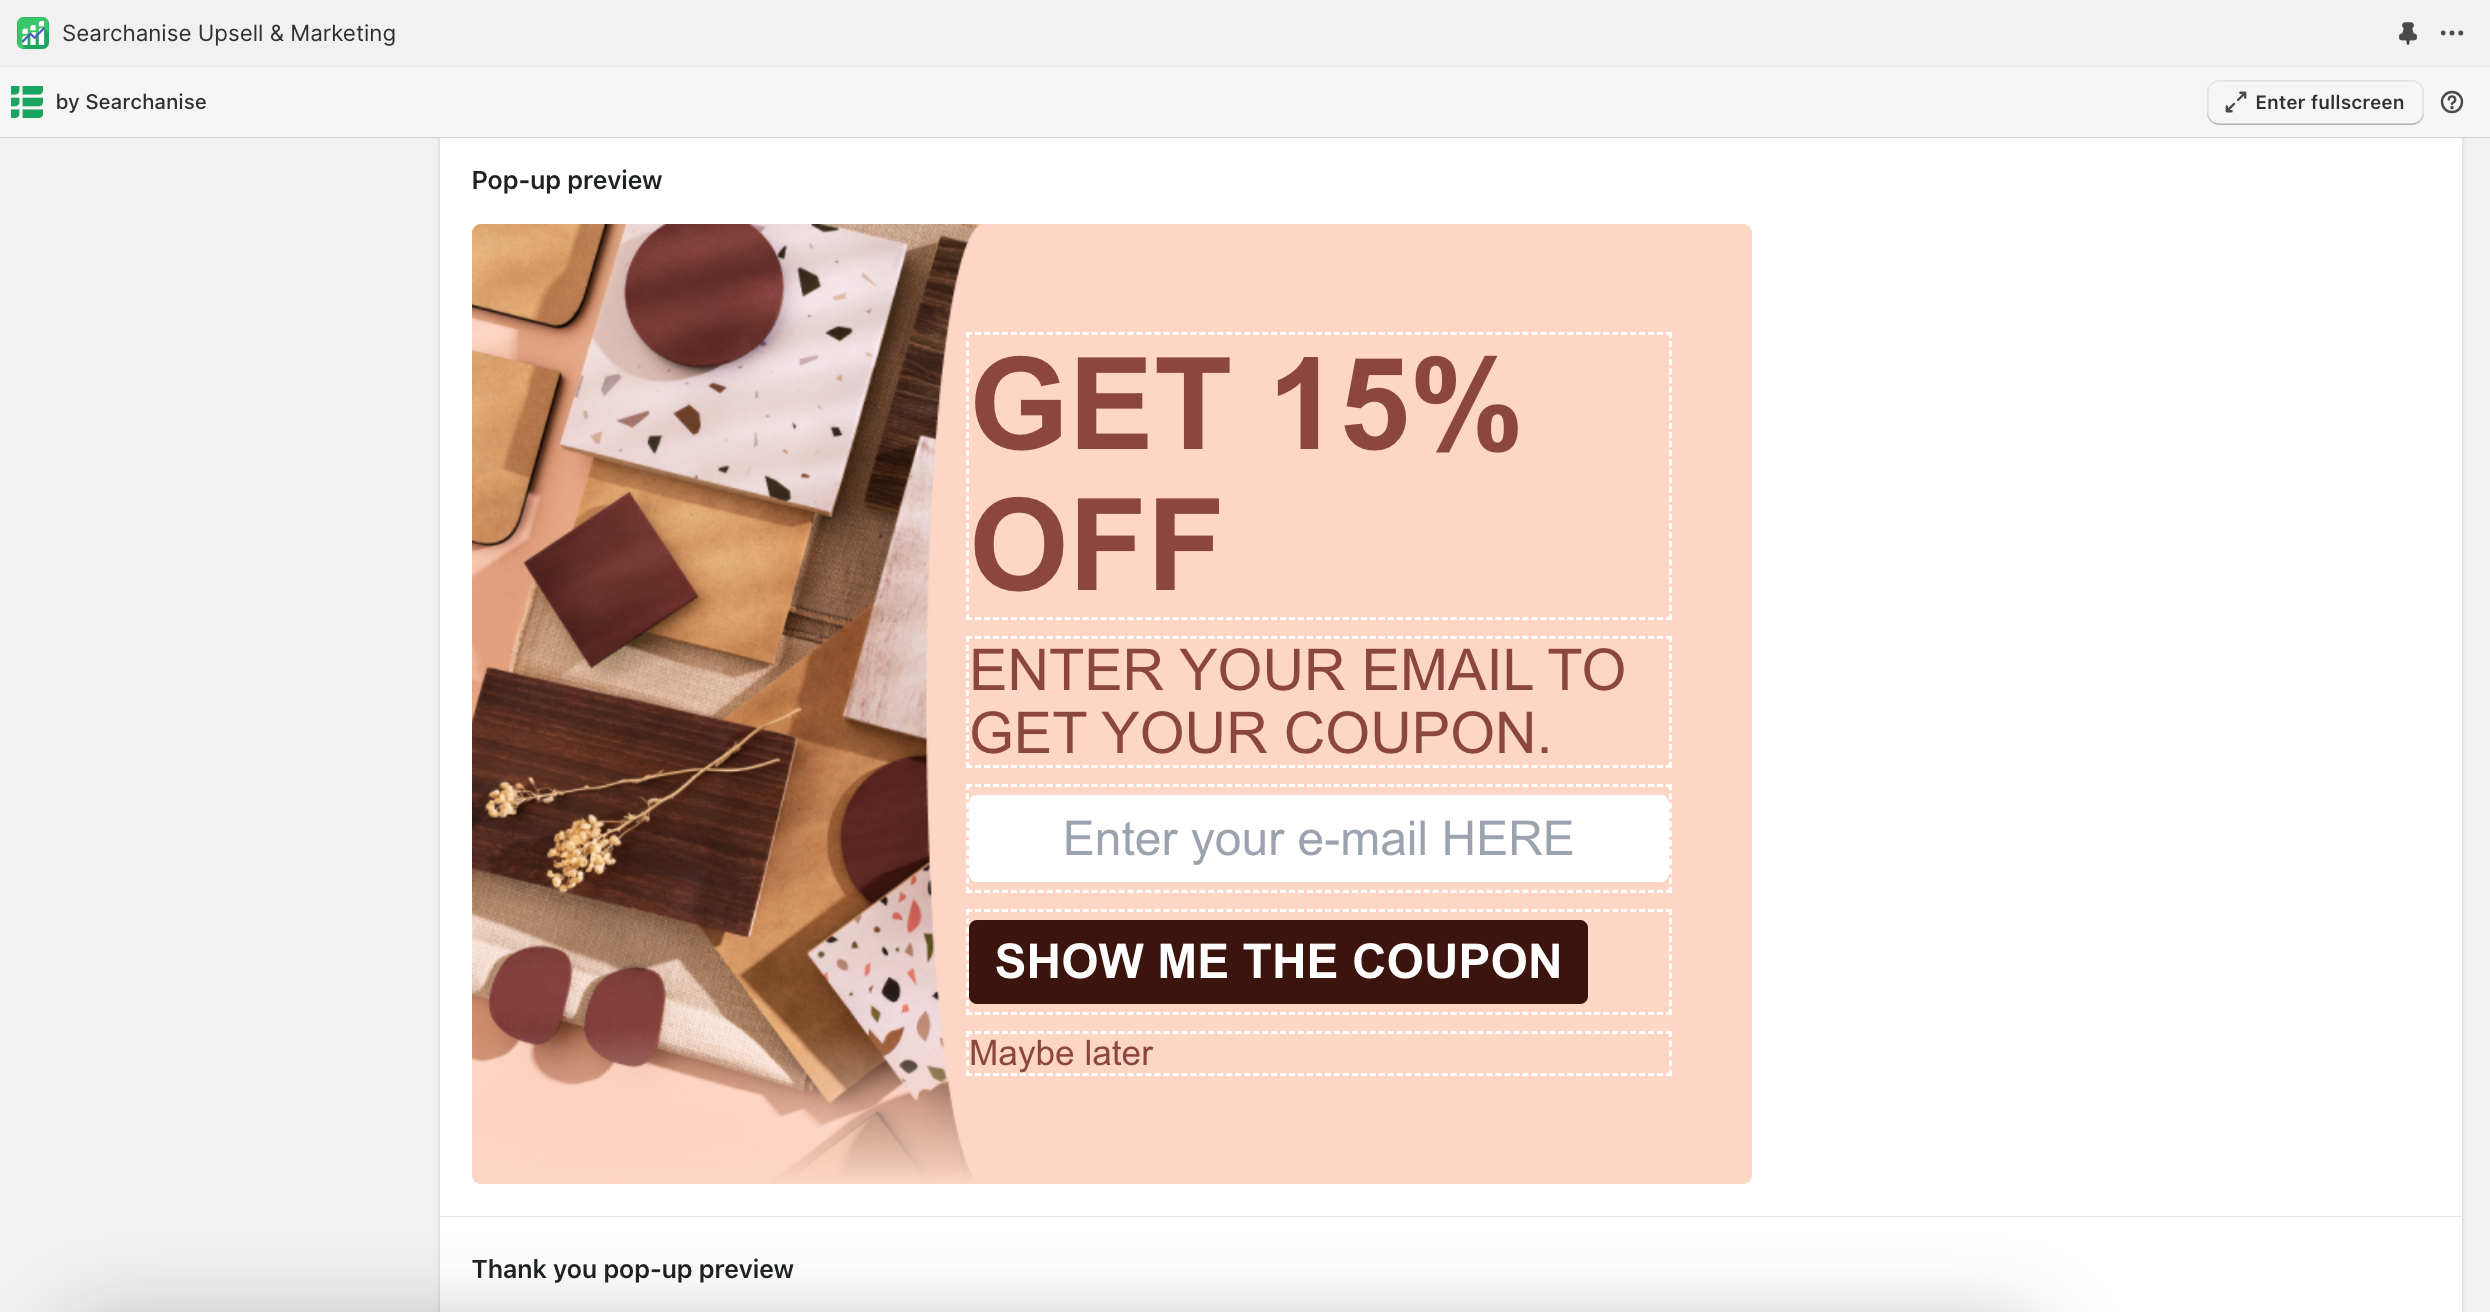
- The Email Collection Pop-up asks visitors to subscribe to your newsletter and offers a discount of Shopify store credtis after the subscription
- The Redirect Pop-up suggests your customers visit a storefront that matches their location
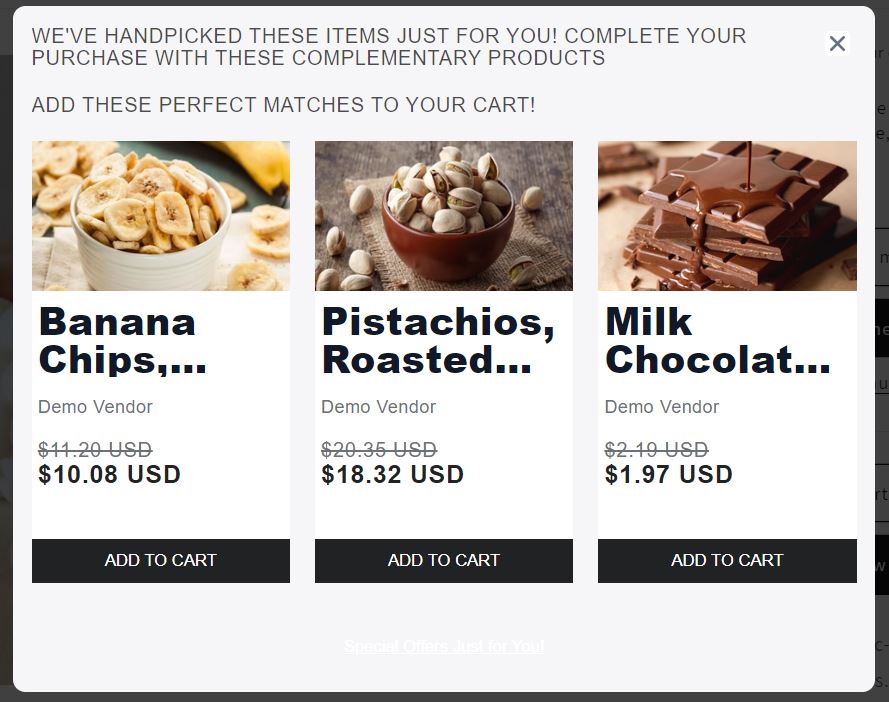
- The Cross-Sell Pop-up suggests customers add more items to their carts by showing products they may be interested in.
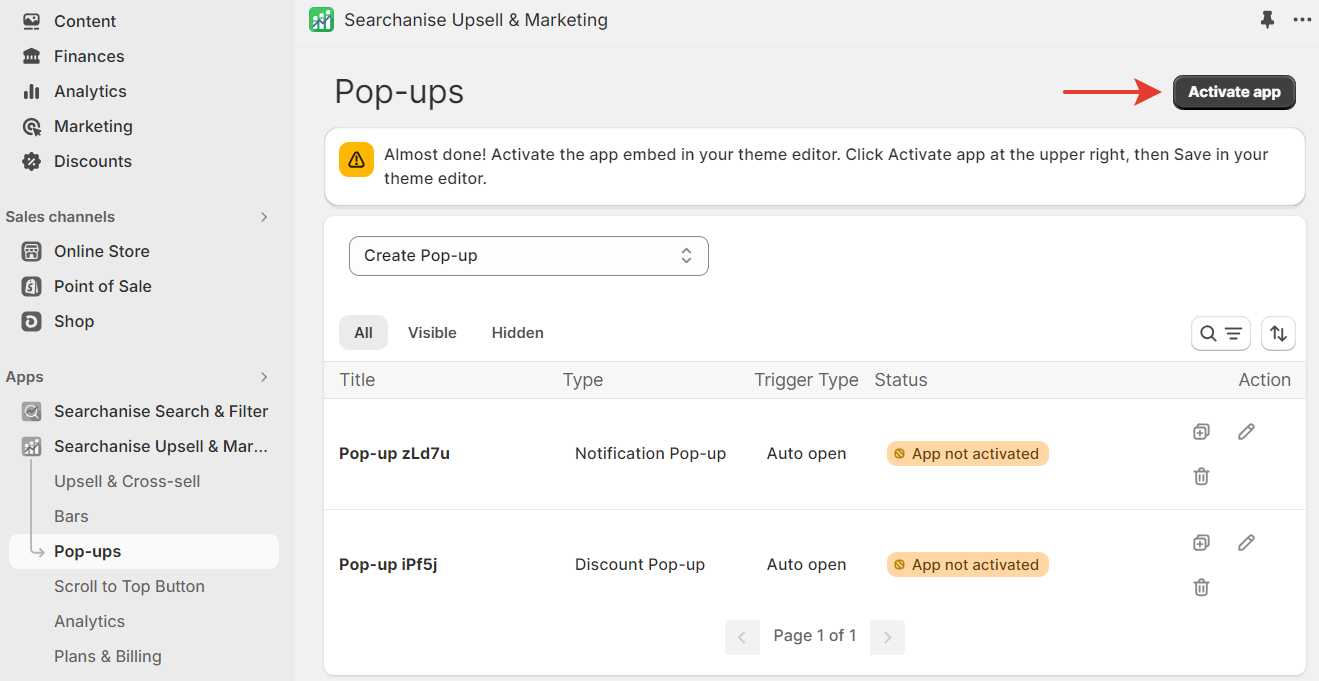
Activation in the Theme Editor
You can activate pop-ups by clicking the button at the upper right. The app will display a pop-up in your Online Store if it has a visible status.
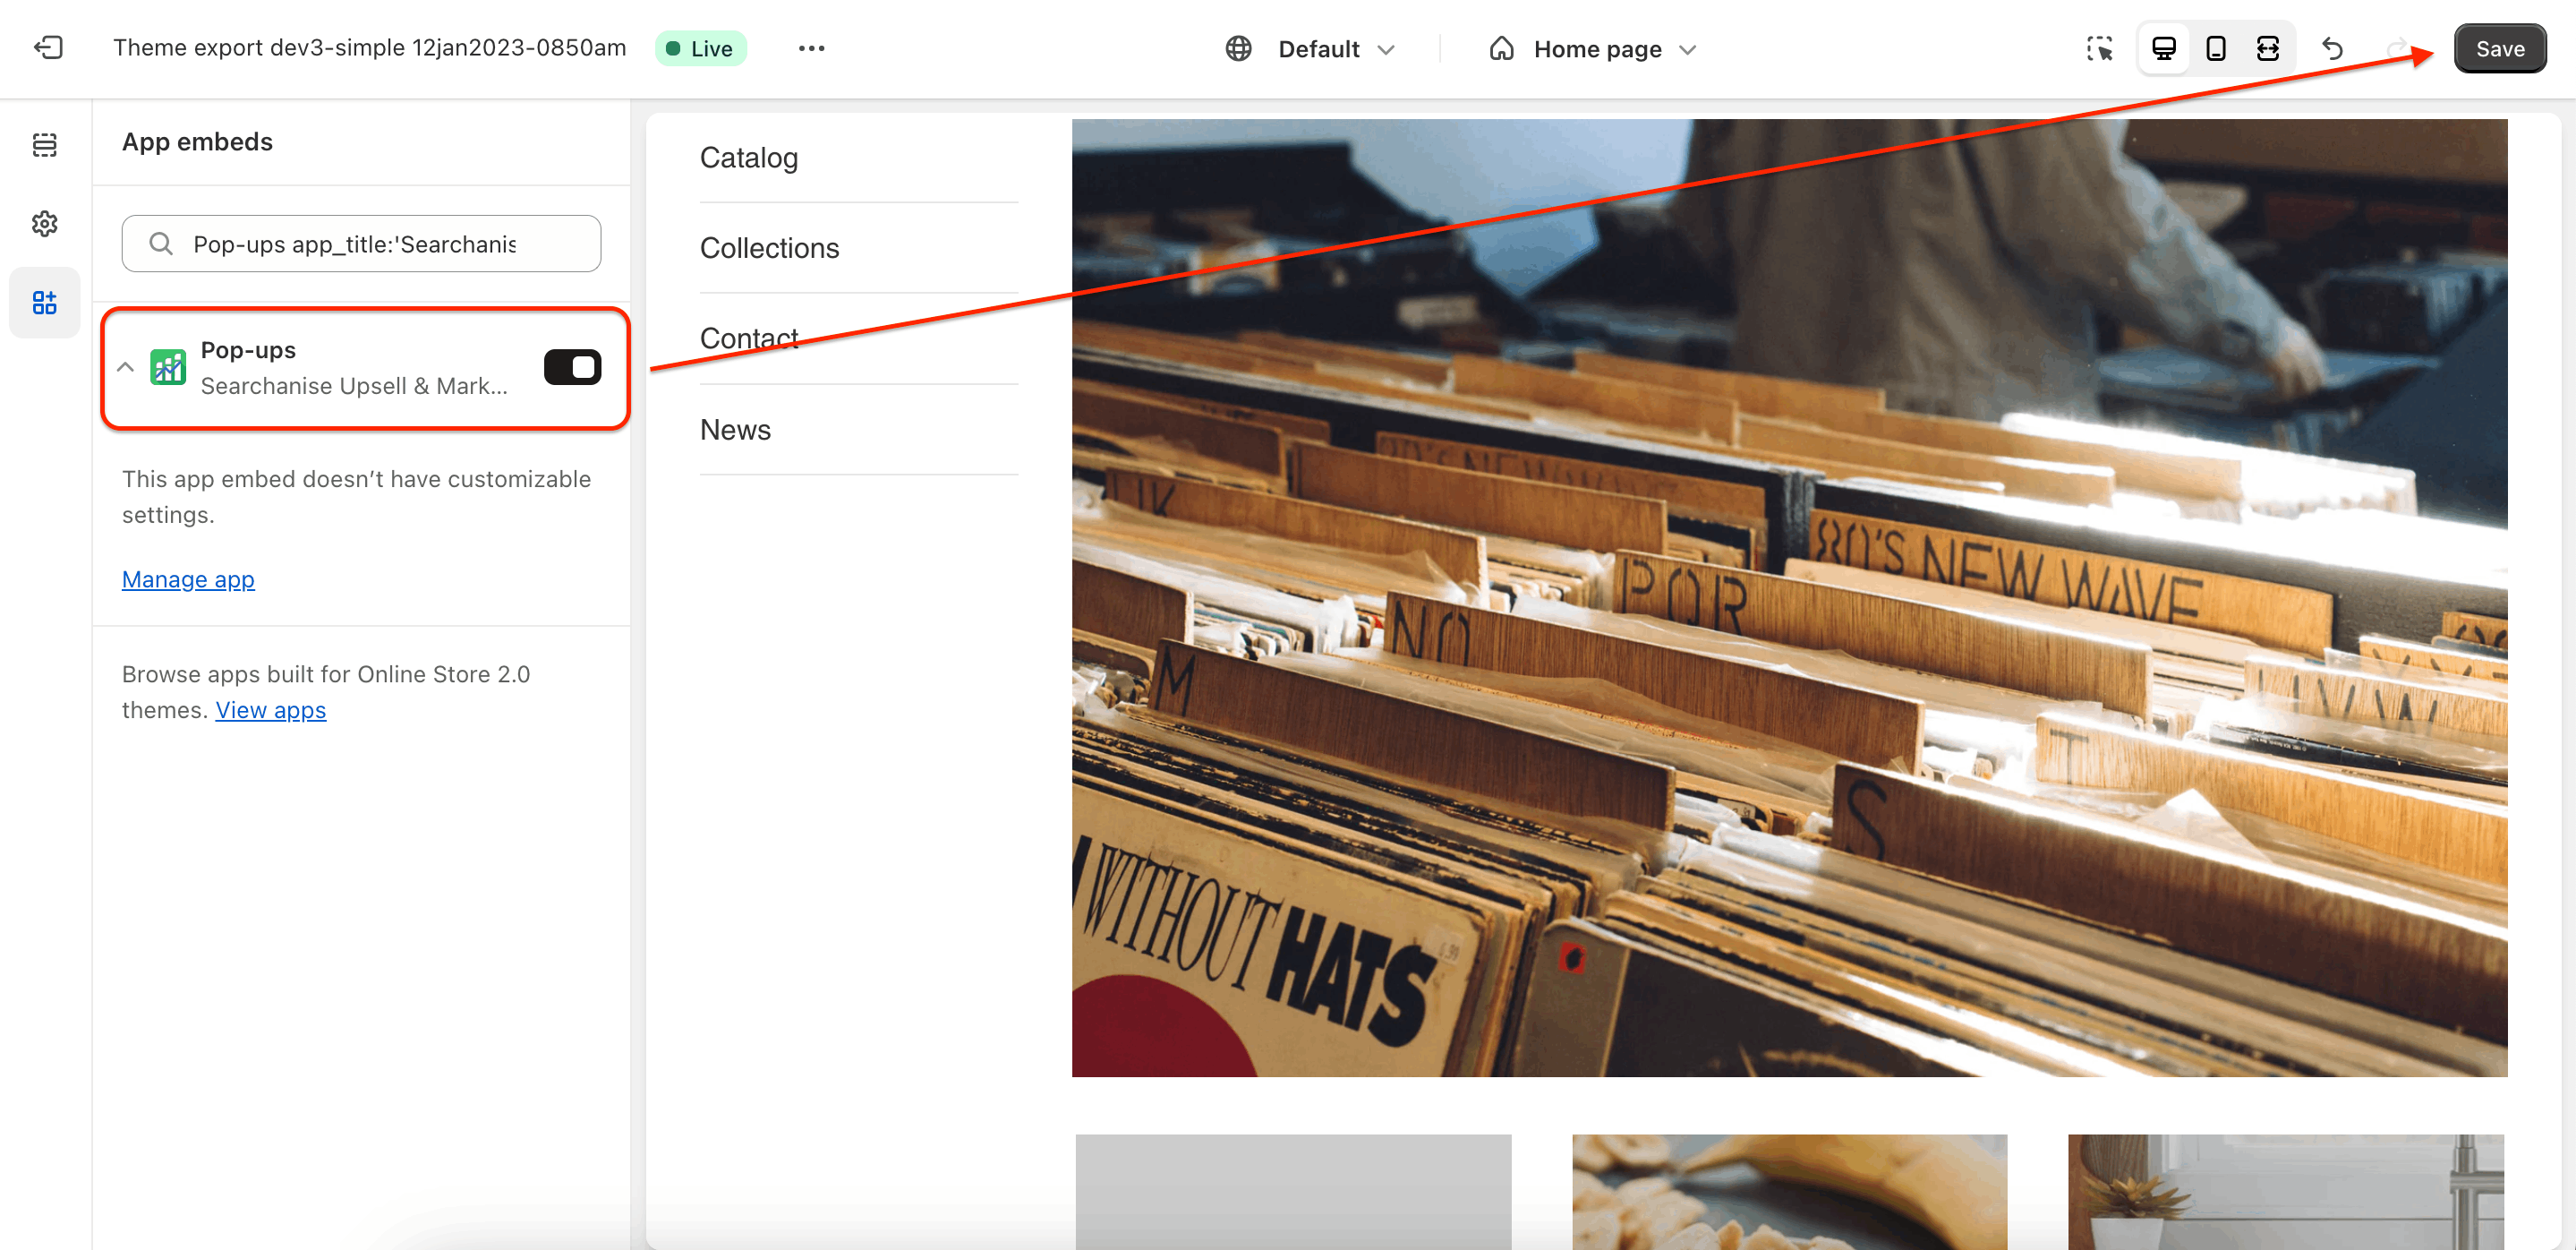
After you hit Activate app, the app redirects you to the theme editor’s App embeds tab. To activate the app, switch the toggle on and save the changes.
To deactivate the app, follow the steps above and switch the app embed off.
If you have published a new theme in your store, you need to turn on app embeds for this new live theme.
Creating a pop-up
To create a pop-up, follow these steps:
- From your Shopify admin, go to the Searchanise Upsell & Marketing admin.
- Open the Pop-ups app.
- Click Create Pop-up and select its type.
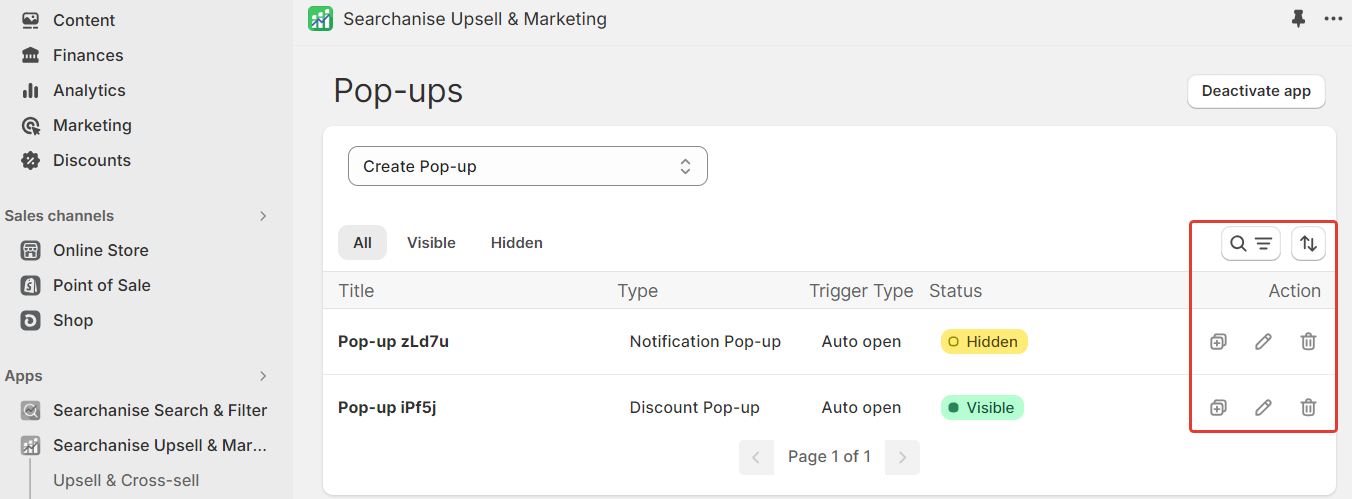
A new pop-up is added to the top of the list.
By default, the status of a new pop-up is set as hidden. You can activate its display by clicking on the status name, which switches its value to visible. A dialog box will ask you to confirm the action.
You can also clone an existing pop-up by clicking on the duplicate icon in the Action column. The pop-up you cloned is added to the list. It has the same title as the original bar and the clone mark.
To find an existing pop-up, enter its title in the Search and Filter box.
Configuring a pop-up
Сonfigure a pop-up from the Edit Pop-up page by clicking the pencil icon in the Action column.
If you select the Auto open trigger type, the pop-up will be displayed to customers after the time set up in the Display Rules. If you select the Exit intent trigger type, the pop-up will be displayed when the customer is about to leave the store.
After you’ve made changes to the settings, a pop-up notification will appear at the top of the page reminding you to save them: “Unsaved changes”. You can then Save or Discard them.
You can return to the list of pop-ups by clicking the arrow (back button) at the upper left.
Notification Pop-up
General: you can change internal pop-up’s title, trigger type, and visibility.
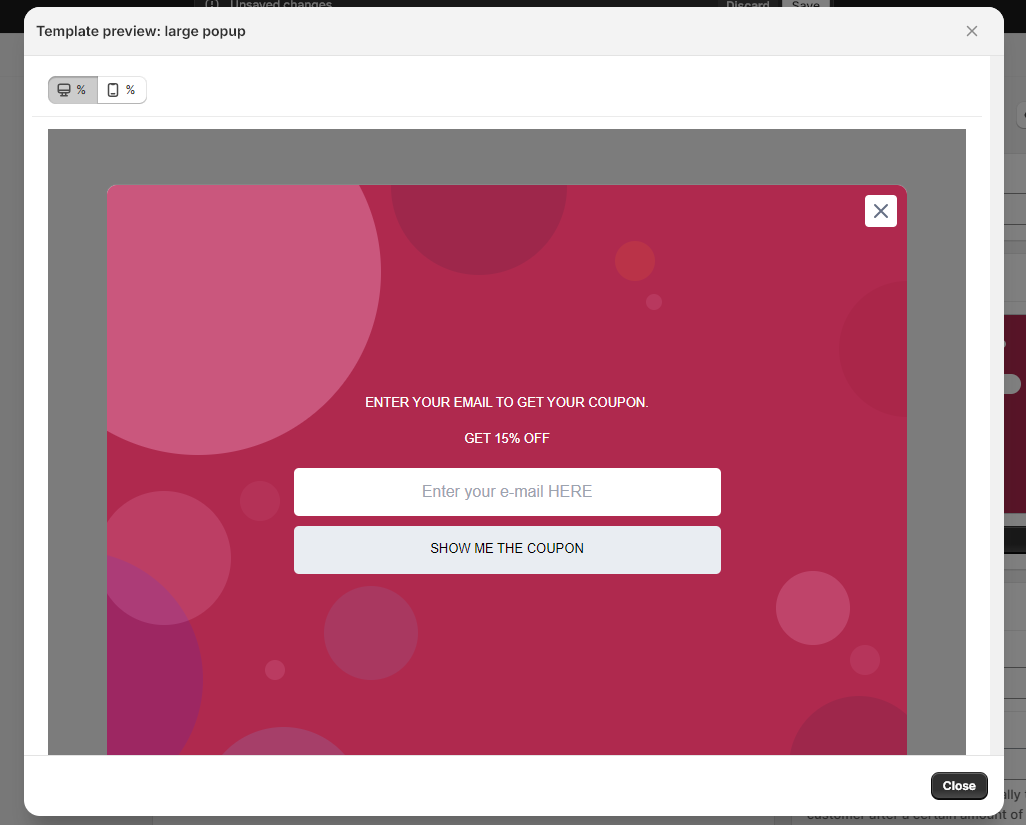
Preview: the preview button is located in the top right corner above the settings.
Pop-up content:
- select the pop-up’s size (small, medium, or large)
- set up the corner rounding
Templates: Select one of the ready-made design templates or upload an image (maximum file size is 1024 KB). If you’ve uploaded an image, you can also select its position (left, right, or background), and in case of left/right image position, you can choose the message background color.
A ready-made design template has a default style, such as background image, text font family, size, and colors. You cannot change this style.
Texts: Customize the pop-up’s texts and style.
Actions: Select a call-to-action:
- Add a button to the pop-up
- Make the entire pop-up clickable
- Do not make the pop-up clickable
If you want the pop-up to be clickable, you can add a Button URL, which is a link that will open when hitting the button. You can enable the option to open the link in a new tab.
Display rules: You can decide how and when to display the pop-up in your Shopify store:
- Select visitors’ target device to display the pop-up on: mobile and/or desktop
-
Set up a time delay before the pop-up appears on the store page. You can use additional settings to display the pop-up:
-
- Display after X page views
- Display again after X hours
-
- Restrict the availability of the pop-up for some Shopify store pages
| Display the bar on | Do NOT display the bar on |
|---|---|
| All pages Home page Product page Search results page Cart page Collections Custom link (add any page link) Keywords (add any keyword from the store page URL) | Off Home page Product page Search results page Cart page Collections Custom link (add any page link) Keywords (add any keyword from the store page URL) |
- Select the display time option: permanent or custom
- Permanent: Always show a pop-up
- Custom: Set up your schedule using the Start and end display time options and User timezone detection by user IP address
Geolocation: Уou can add locations where the pop-up can be displayed or not based on the visitor’s IP address:
- Click Add new location.
- Start entering a location and then select one of the options suggested.
If you want to remove the location, hit the delete icon. A dialog box will ask you to confirm the deletion.
Teaser settings: Pop-up teaser is a small window on the side of the screen that reopens the pop-up again after it has been closed. You can specify its text, color, style, position, and the option to close the teaser.
Email Collection Pop-up
You can provide either a discount or Shopify Store credits for the customer’s email.
The app creates discount codes and saves them in Discounts in your Shopify admin. When you open the discount settings page, you can see a record in the Timeline section: “Searchanise Upsell & Marketing created this discount.”
General: you can change internal pop-up’s title, trigger type, and visibility.
Preview: the preview button is located in the top right corner above the settings.
Templates: Select one of the ready-made design templates or upload an image (maximum file size is 1024 KB). If you’ve uploaded an image, you can also select its position (left, right, or background), and in case of left/right image position, you can choose the message background color.
A ready-made design template has a default style, such as background image, text font family, size, and colors. You cannot change this style.
Pop-up content:
- select the start or success screen to preview the pop-up and customize the corresponding settings below
- select the pop-up’s size (small, medium, or large)
- set up the corner rounding
Reward: Select a bonus for your customers:
- A discount with a percentage or a fixed amount in exchange for subscribing to your newsletter. A fixed amount discount can be specified in a dollar value, but it is calculated and displayed in the currency of your Online Store.
- Shopify Store credits: Set the amount and an expiration date for the credits if needed.
When you set up a discount value, you can specify the following:
- Whether the discount can be combined with shipping/product/order discounts
- The number of days the code is valid
- The number of times the code can be used
- Whether the discount can be used once by one customer
- Minimum purchase requirements:
- No minimum requirements
- Minimum purchase amount ($)
- Minimum quantity of items
Texts: Select the start or success screen in the Pop-up content section and customize the pop-up’s texts and style.
Actions: Set up the button’s color, text, and style. Enable an opt-in checkbox if needed.
Display rules: You can decide how and when to display the pop-up in your Shopify store:
- Select visitors’ target device to display the pop-up on: mobile and/or desktop
-
Set up a time delay before the pop-up appears on the store page. You can use additional settings to display the pop-up:
-
- Display after X page views
- Display again after X hours
-
- Restrict the availability of the pop-up for some Shopify store pages
| Display the bar on | Do NOT display the bar on |
|---|---|
| All pages Home page Product page Search results page Cart page Collections Custom link (add any page link) Keywords (add any keyword from the store page URL) | Off Home page Product page Search results page Cart page Collections Custom link (add any page link) Keywords (add any keyword from the store page URL) |
- Select the display time option: permanent or custom
- Permanent: Always show a pop-up
- Custom: Set up your schedule using the Start and end display time options and User timezone detection by user IP address
Geolocation: Уou can add locations where the pop-up can be displayed or not based on the visitor’s IP address:
- Click Add new location.
- Start entering a location and then select one of the options suggested.
If you want to remove the location, hit the delete icon. A dialog box will ask you to confirm the deletion.
Teaser settings: Pop-up teaser is a small window on the side of the screen that reopens the pop-up again after it has been closed. You can specify its text, color, style, position, and the option to close the teaser.
Redirect Pop-up
General: you can change internal pop-up’s title, trigger type, and visibility.
Preview: the preview button is located in the top right corner above the settings.
Templates: Select one of the ready-made design templates or upload an image (maximum file size is 1024 KB). If you’ve uploaded an image, you can also select its position (left, right, or background), and in case of left/right image position, you can choose the message background color.
A ready-made design template has a default style, such as background image, text font family, size, and colors. You cannot change this style.
Pop-up content:
- select the pop-up’s size (small, medium, or large)
- set up the corner rounding
- select the image position
Texts: Customize the pop-up’s texts and style.
Actions: Set up color, text, and style for Accept and Decline buttons.
Display rules: You can decide how and when to display the pop-up in your Shopify store:
- Select visitors’ target device to display the pop-up on: mobile and/or desktop
- Select whether to show the pop-up once or always
- Specify the target URL for this Redirect Pop-up
Geolocation: Уou can add locations where the pop-up can be displayed or not based on the visitor’s IP address:
- Click Add new location.
- Start entering a location and then select one of the options suggested.
If you want to remove the location, hit the delete icon. A dialog box will ask you to confirm the deletion.
Teaser settings: Pop-up teaser is a small window on the side of the screen that reopens the pop-up again after it has been closed. You can specify its text, color, style, position, and the option to close the teaser.
Cross-Sell Pop-up
General: you can change internal pop-up’s title, visibility, and trigger options:
- Activation type: adding an item to the cart or visiting the cart
- Order value: specify the amount of order that should be reached (Show if more than) or not reached (Show if less than) to trigger the pop-up
- Trigger products: products whose addition to the cart triggers the pop-up (when adding items to the cart is selected)
- Trigger time-out: with each action/every 30 minutes/every hour/once a day
Display rules: You can decide how and when to display the pop-up in your Shopify store:
- Select visitors’ target device to display the pop-up on: mobile and/or desktop
-
Set up a time delay before the pop-up appears on the store page.
- Products to display in the pop-up (when adding items to the cart is selected)
- Number of products (1-3) in the pop-up
- Select the display time option: permanent or custom
- Permanent: Always show a pop-up
- Custom: Set up your schedule using the Start and end display time options and User timezone detection by user IP address
Reward:
- Discount size: none/fixed/%. If there is a discount:
- Ability to combine with other discounts
- Discount limitations (in days)
- Number of times the discount can be used
- Multiple use for one user
- Requirements (none/min. order amount in $/min. number of items)
Texts: customize pop’s title and text.
Actions: customize pop’s button and link.
Teaser settings: Pop-up teaser is a small window on the side of the screen that reopens the pop-up again after it has been closed. You can specify its text, color, style, position, and the option to close the teaser.
Geolocation. You can add locations where the pop-up can be displayed or not based on the visitor’s IP address:
- Click Add new location.
- Start entering a location and then select one of the options suggested.
If you want to remove the location, hit the delete icon. A dialog box will ask you to confirm the deletion.
Deleting a pop-up
If you want to delete a pop-up, click the delete icon in the Action column from the list. A dialog box will ask you to confirm the action by clicking Delete.